ClosetMaid Fixing Methods
ClosetMaid is available in a number of different styles each with their own fixing or assembly methods.
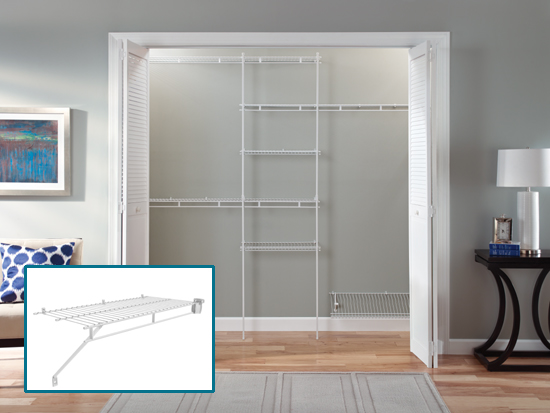
Regular Fix (Wire)
Regular fix is also sometimes known as permanent fix. This method requires small plastic wall clips to be screwed to the back wall of the enclosure every 12" (30.5cm) along the length of the shelf, with support brackets and side wall brackets to be used as required. All fixings are screwed into stud, or block walls. Regular fix is a cheaper option compared to our adjustable ShelfTrack system, however it does not offer the same flexibility.
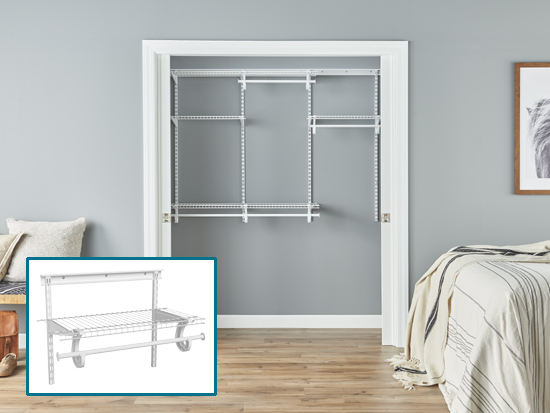
ShelfTrack (Wire)
Adjustable ShelfTrack is great for growing kids closets or heavy loads. Its horizontal Hang track and vertical Wall standards, screw to the back wall creating a track system that shelf support brackets simply slot into to support the shelving. These brackets can then be unclipped and repositioned as required to change the entire layout of your storage solution or simply adjust the height of one your shelves!
Mounting Options
| Fixed Mount | Adjustable Mount |
 |  |
|
|
 |  |
Wire Fixing Tips
Our Wire shelving systems are very simple to install, but for anyone who has never done it before, we have compiled some great tips which should help you! If you have any tips - send them to us via our contact us page and the best ones will get included here!
Cutting and finishing
Our shelving and hang bars are sold in set lengths, and therefore can be trimmed to suit your exact measurements.
Cutting is easy; simply use a hacksaw or boltcutters to trim off the excess and use our shelf end caps and hanger bar end caps to finish the ends off neatly. We have different sized shelf end caps depending on the style of shelving that you are using, as well as different hanger bar end caps depending on the end point of your enclosure.
Helpful dimensions and recommended shelf positions
ClosetMaid systems are simple to adjust and modify depending on your requirements, however we do have some recommended dimensions for where to place your shelving etc. so that you can make the most out of your closet.
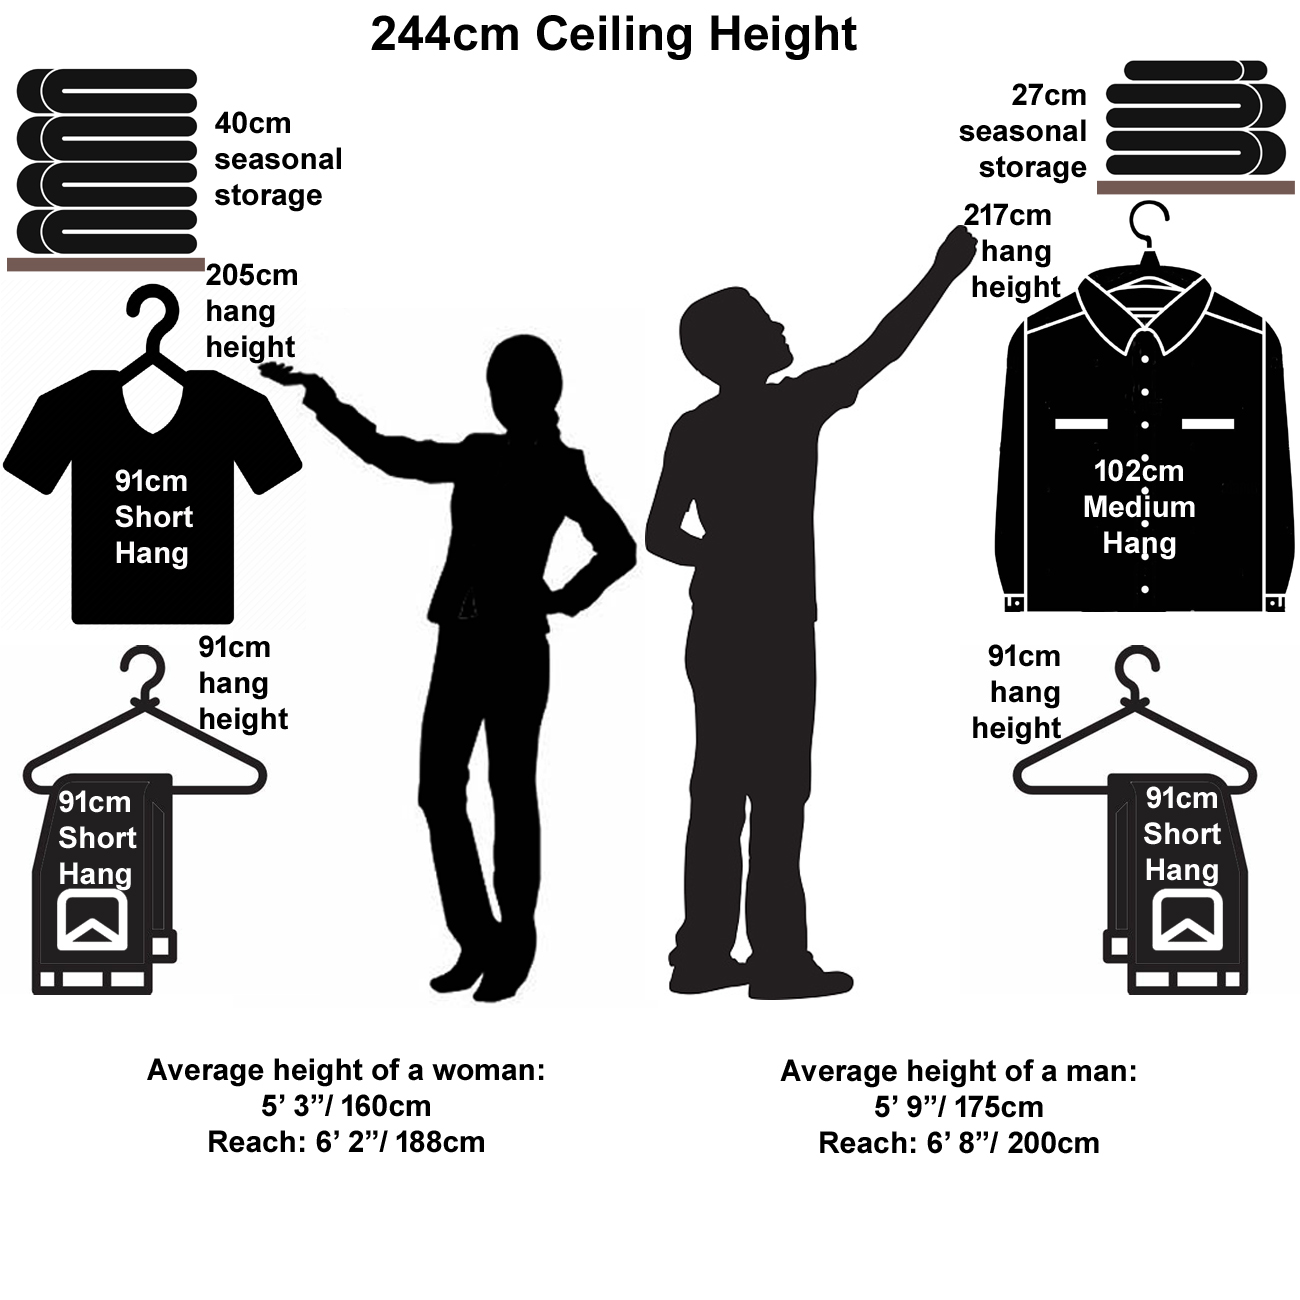 |
Long Hanging items:
We generally find that an ideal height for shelving when storing long garments is 70" (178cm) from the floor. If you have full length ball gowns etc to store, OR if you are placing a shoe rack below your long hanging, it is recommended that you place the shelf 84" (213cm) from the floor.
Short Hanging items:
We generally find that an ideal height for shelving when storing short hanging garments is 42" (107cm) from the floor OR from the shelf below. When storing short garments on two levels (two tier hanging) it is recommended that you place the top shelf at 84" (213cm) from the floor and the lower shelf at 42" (107cm) from the floor. When storing children's clothes, you are normally able to store garments with less space between the sections. Therefore for children under 10, it is generally considered that you can expect to utilise an average height room to have three tier hanging for short garments rather than two tier in adult closets. When creating three tier hanging the top shelf would be placed at 84" (213cm) above the floor, the middle shelf 56" (142cm) from the floor and the bottom shelf 28" (71cm) from the floor.
Garment widths
Garments once on their hangers are approximately 22" - 24" (55cm - 61cm) wide. Consider this dimension when trying to determine whether or not to utilise all walls on a walk in closet for hanging purposes, and make sure to leave yourself at least 24" (61cm) of space between the edge of the garments / shelving to walk between.
Shoe Shelves
Our Shoe shelves normally use our 12" (30.5cm) deep Shelving, turned upside down and held at an angle to the wall. When working out how much shoe shelving you require, our designers usually work on the basis that a pair of ladies shoes are 8" (20cm) wide and a pair of mens shoes are 10" (25.4cm) wide. Depending on the style of shoe your are planning on storing (i.e. high heels / boots/ trainers) will determine the spacing between the shoe racks, however the shoe racks take about 8" (20cm) in height on their own, without allowing extra room for heels, or tall boots.
Click here to download our Regular Fix Shoe Shelf Support Bracket installation instruction PDF -Download
Throughout the website you will notice several references to the available side walls that you have. This relates to the walls at either end of the enclosure or space you are utilising that you may or may not have.
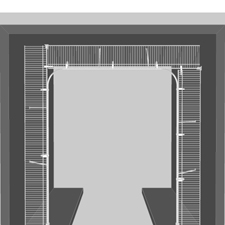
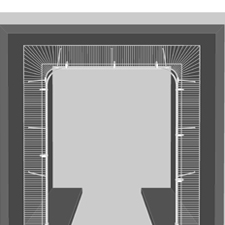
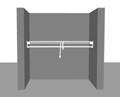
For example, when using one wall for storage space only, you may have a side wall at either end to fix supports to. In this case we call it a Wall - Wall enclosure. (image one below)
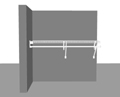
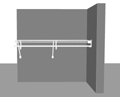
Sometimes your enclosure may have one side wall, but at the other end of the space, there is no where for the ends of the shelving to fix to, or the wall that is there is not deep enough to attach fixings to. In this case we call it a Wall - Open enclosure / Open - Wall enclosure, depending on the side that the wall is present. (image two & three below)
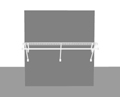
Sometimes your enclosure may have no available side walls to fix to. In these cases, it doesn't mean that you can not use our system, it simply means we have to send you different hardware. We call this an Open - Open enclosure (image four below).
| WALL - WALL | WALL - OPEN | OPEN - WALL | OPEN - OPEN |
 |  |  |  |
Utilising corners for hanging garments.
There are two different fixing methods to use when creating corner hanging in your walk in closet. You can do this by creating either the Butt Fit Method (bottom picture Left) or with our Corner Shelves (bottom picture Right).
Butt Fit
This is when you simply butt adjacent shelves up to one another, and use our Corner Supports to help keep the fitting in position and supported adequately. The hang bar when using SuperSlide will then clip onto the shelf underneath as usual, with the corner hanger bar being used too. When using Shelf & Rod, the hang bar is attached to the shelving so there will be no corner hanger bar in this case.
Click here to download our 120 Corner Support Installation Instruction PDF -Download
Corner Shelves
This method uses our individual corner shelves to create the hanging section. These corner shelves are installed first and are specially shaped to fit into all right angled corners. The straight shelves then connect at either side of the corner shelf to extend the hanging onto the adjacent walls. When using SuperSlide the hang bar will then clip onto the shelf underneath as usual, with the corner hanger bar being used here too. When using Shelf & Rod, the corner shelf comes with a rounded corner bar already attached. See images below for a better idea.
BUTT FIT CORNER SHELVES